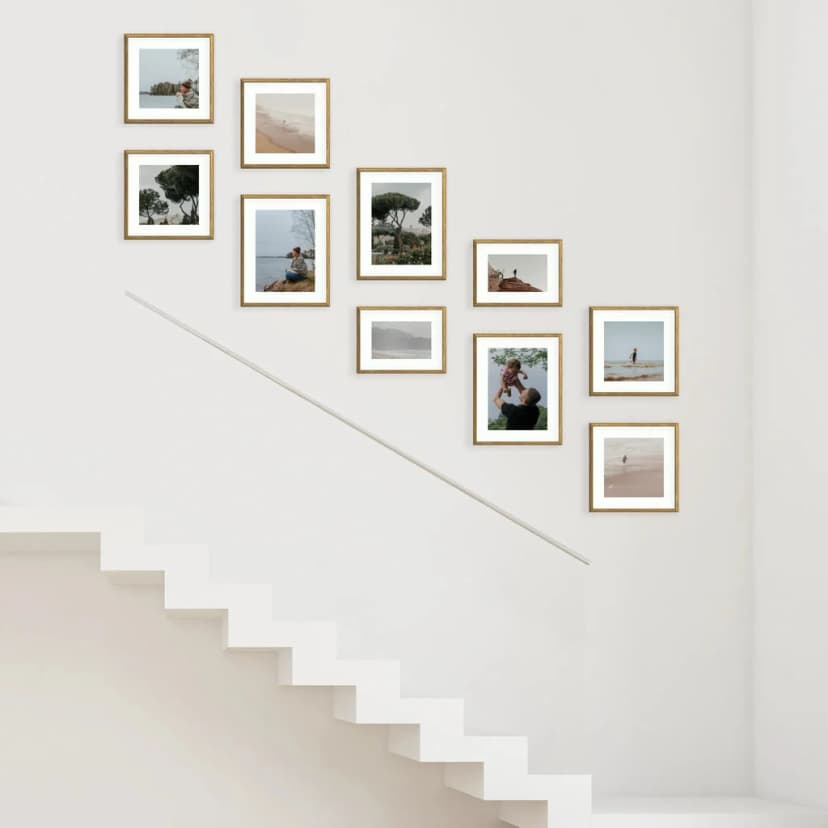
How to Hang a Photo Gallery Wall on Stairs
Hang a staircase photo gallery in about 15 minutes: measure the rise, pick a stepped layout, use Framky’s 1:1 template — no drill.
5 min read
Article
Plan a photo gallery from pregnancy through the first year — 13-frame timeline, where to hang it, annual photo swaps. Practical guide.
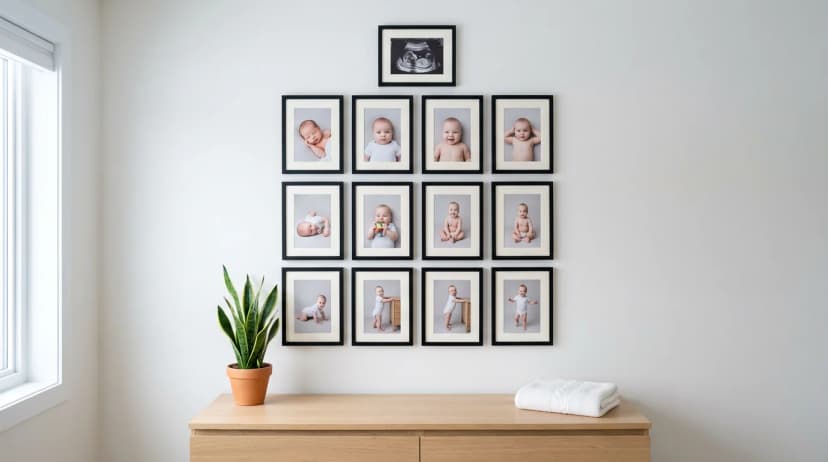
Quick answer: A pregnancy and first-year photo gallery is a 13-frame timeline — 1 ultrasound or bump photo, 12 monthly baby photos from birth to first birthday. Best locations: parents' bedroom or nursery. Optimal frame sizes: 20 × 30 cm or 15 × 21 cm, arranged in a 3 × 4 + 1 grid (or 4 × 3 + 1 landscape). The gallery evolves — on each birthday, swap the 12 monthly photos for 12 new ones.
The first 12 months of a baby's life everything changes rapidly — appearance, proportions, expression, gaze. Parents often say later, "I can't remember what they looked like at two months" — photos preserve that memory continuity. Rather than leaving them in your phone, a 13-frame timeline becomes a living record that grows with your child through infancy. This article shows you how to plan it and keep it going beyond the first birthday.
A first-year timeline gallery is 12–13 photographs arranged chronologically, showing your baby's development from pregnancy through 12 months of life. Unlike a typical family gallery, this has a clear temporal narrative: each photo marks a specific month, and visual order matches time order. Reading the gallery left-to-right or top-to-bottom is like flipping through a family album.
A standard first-year gallery has 13 photos:
Frame 1: Pregnancy — one image from before birth. Two common options:
Frames 2–13: 12 months — one photo per complete month of life (ages 0, 1, 2, 3, ..., 12). Most parents set a monthly photo date — e.g. the 7th of each month — and capture one image then.
| Frame size | Layout | Total width | Total height | Best room |
|---|---|---|---|---|
| 15 × 21 cm | 4 × 3 grid + 1 | approx. 100 cm | approx. 95 cm | Small nursery, parents' bedroom |
| 20 × 30 cm | 4 × 3 grid + 1 | approx. 135 cm | approx. 135 cm | Standard nursery, lounge |
| 20 × 30 cm | 13 in a row | approx. 390 cm | 30 cm | Long hallway or entrance |
| 30 × 40 cm | 4 × 3 grid + 1 | approx. 175 cm | approx. 175 cm | Large room, above dresser in lounge |
Key principle: In a first-year timeline, format consistency matters more than in family galleries. 13 frames of the same size create a "calendar" effect that powerfully reinforces the timeline narrative. Mixing sizes breaks the chronological feeling.
Most common choice. Parents see the gallery morning and night, at moments when thoughts naturally drift to the baby. The bedroom is also private — not every visitor needs to see 13 photos of your child.
Recommendation: 4 × 3 + 1 grid (row 1: months 0–3, row 2: months 4–7, row 3: months 8–11, with pregnancy and 12-month photos at top or bottom as "bookends").
Second most popular choice, especially once the baby starts recognising themselves in photos. After the first birthday, the gallery becomes the child's personal "museum", which they explore with parents through colourful stories.
Recommendation: mount centre at 130–140 cm height (child will view from below).
For parents who want guests to notice the gallery. A long, linear 13-photo row works brilliantly in typical UK hallways (see our article Photo gallery wall in a hallway).
Over 12 months you photograph in different seasons, different light, sometimes different cameras (phone vs. camera). If you print each photo separately, the gallery will visually fall apart:
Solution: Before printing, run all 13 images through the same editing preset (Lightroom, Snapseed, VSCO) or simply order all prints together from one lab. Pigment printing with a set of 12 inks delivers consistent colours across all images in one order.
The most beautiful aspect of a timeline gallery: it doesn't end at the first birthday. Possible evolution paths:
Key principle: The most common parental regret: starting monthly photos at 4–5 months and wishing you'd captured months 0–3. If you're pregnant or just delivered — take the first photo within the first week. Every photo after that is a bonus, but that first one is irreplaceable.
Yes. Best results come from printing the original DICOM file from your ultrasound clinic (ask for files on disc or USB after the scan). Second choice: scan a printed copy at 300 DPI — lower quality but adequate for 15 × 21 cm frame. Pigment printing with a set of 12 inks reproduces ultrasound greys very well.
For a timeline gallery, you need 12 images — one per month. Take far more though (5–10 per monthly session), then choose the best. Also capture everyday "casual" photos — they won't go in the gallery but will be invaluable in an album or for future frame swaps.
Most common layout: 4 × 3 grid (12 months) with one extra frame for pregnancy/ultrasound placed at top, bottom, or beside. Read the grid: left-to-right, top-to-bottom (month 0 in top-left, month 11 in bottom-right). For hallways, use a single row: all 13 photos in one horizontal line.
Yes, but it requires planning. Best strategy: when designing the first gallery, leave room for expansion (4 × 4 grid with 13 first-year photos + 3 empty spaces for years 1–3). Alternatively: build a separate "second year" gallery on another nearby wall.
For a 4 × 3 + 1 grid, we recommend 20 × 30 cm (total gallery about 135 × 135 cm) or 15 × 21 cm (about 100 × 95 cm). Size 30 × 40 cm is too large for 13 frames — the whole display becomes nearly 2 × 2 metres. For a linear hallway arrangement, 20 × 30 cm is optimal.
Three common strategies: (1) "Freeze" — gallery stays as a permanent first-year memento; (2) "Annual swap" — swap 12 monthly photos on each birthday; (3) "Yearly portrait" — after 1st birthday, move to one photo per year and let the gallery grow over time. Choose based on your lifestyle and wall space.
If you're planning a nursery gallery, read Photos for a nursery — gallery by age. For choosing wall placement and height, Psychology of photo placement is useful. If you want to understand how family photos on walls affect a child's wellbeing, explore Psychology of family photos on walls and wellbeing.
Build your 13-frame first-year timeline — printed together on matte photographic paper for perfect consistency — in the Framky configurator.
Sign up and we'll send you a code with a bigger discount than the shop offers — plus occasional inspiration for your photo gallery wall.
Hang a staircase photo gallery in about 15 minutes: measure the rise, pick a stepped layout, use Framky’s 1:1 template — no drill.
Hang a photo wall in the stairwell: measure the rise, pick a layout along the banister, use a 1:1 template. No drill, about 15 minutes.
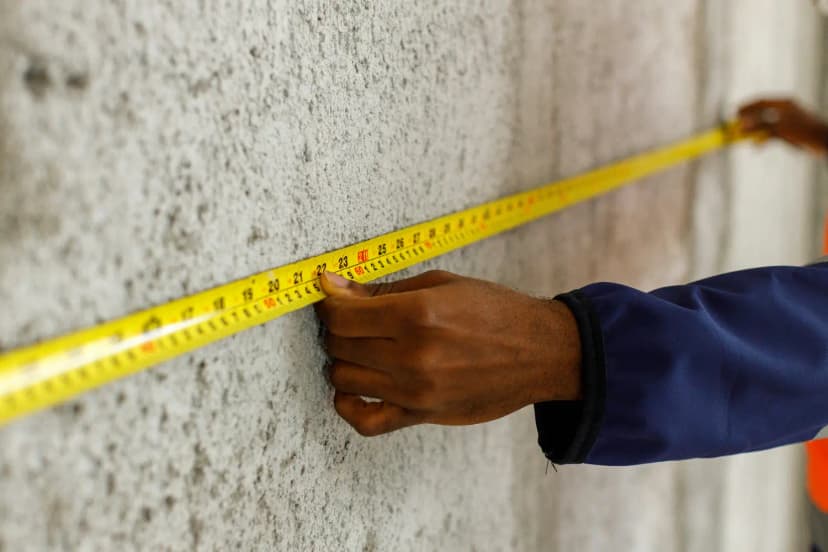
See gallery wall layouts with real sizes — 3, 5, 6, 8, 10+ frames. Match a Framky kit to your wall width, then hang with a 1:1 template.
Give it a try?
See how it works