AI photo editor in Framky: fix a photo with one instruction before print
•6 minutes reading
The AI editor in Framky fixes a photo from one sentence: it removes people from the background, opens closed eyes, smooths wrinkles and blurs the background. See how the preview, the final version and credits work.
Short answer: The AI editor in Framky changes a photo from one sentence. You type what should change, for example “Remove people from the background”, look at a quick preview, and when the result suits you, you create a final version in full quality for print. The editor runs on credits and needs an account.
The best photo often has one flaw. Someone blinked, a stranger stands in the background, cables cross the landscape. On a phone screen it is easy to miss. In a large frame on the wall you see it at once. The AI editor lets you fix that in the same place where you design a photo gallery wall, without a separate graphics programme.
The editor has no list of tools to click through. You describe the change in your own words. The most common fixes before printing:
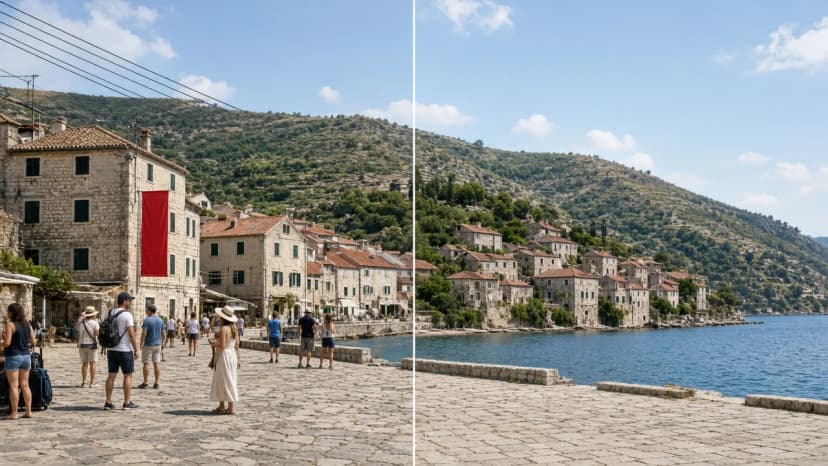
Removing people from the background. Stray passers-by and tourists disappear, and the background is filled in.
Removing distractions. Banners, advertising boards, cables and power lines over a landscape.
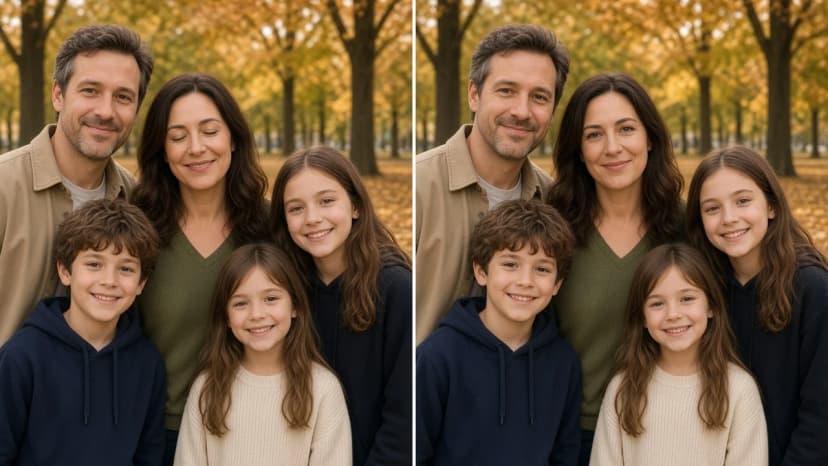
Opening eyes. In a group photo, the person who blinked gets open eyes.
Smoothing wrinkles. Gently, without a plastic-skin look.
Background blur. The person stays sharp, and the background softens as with a portrait lens.
The editor also includes ready-made ideas for a change of style: “Black and white film look”, “Make it a golden-hour sunset”, “Turn it into a watercolor painting”, or refreshing an old photo.
“Open the eyes of people who blinked”: one instruction instead of reshooting
Where to find the editor
You open the editor with the “Edit with AI” button next to a photo you have uploaded to the project. In the gallery configurator there is a “Edit photos with AI” button. A photo from the Framky Artists catalogue can be added to your photos and edited straight away: “Add to your photos and edit with AI”. We write about the catalogue in Framky Artists: Photos by Independent Photographers for Your Gallery Wall.
To use the editor, sign in or create an account. A new account receives credits to start with.
How to write a good instruction
The editor asks: “What should change in the photo?”. Answer with one specific sentence. A few rules:
Name the object and the place. “Remove the two people in red jackets on the left of the background” works better than “fix the background”.
One change at a time. Remove the people first, then blur the background. Each further change can start from the previous version: “Edit further from this version”.
Set the strength of the effect. “Gently smooth wrinkles on faces” keeps the face natural. Without “gently”, the effect can be stronger.
Say what should stay. “Blur the background; the people in the foreground stay sharp.”
Example instructions:
Problem
Instruction
Tourists in the background
Remove people from the background
Power lines over the mountains
Remove cables and power lines from the sky
A banner on a building
Remove the advertising banner from the building facade
Someone blinked
Open the eyes of people who blinked
Wrinkles in a portrait
Gently smooth wrinkles on faces
A background that is too sharp
Blur the background; the person in the foreground stays sharp
Preview, final version and comparison
Editing has two stages.
Preview. A quick draft to try out the idea. This usually takes about 10 seconds. Previews are low resolution. Make a final version to use it in your frame.
Final version. When the preview suits you, you create a version in maximum resolution for print. Full quality can take up to 1 minute. You can close the editor. We will let you know when it is ready.
You compare each version with the original on a before-and-after slider (“Original” and “Edited”). The editor can also “Show frame proportions”, so you can see which part of the photo will sit in the frame. Every version stays on the list, so you can go “Back to the original” or “Edit further from this version”. The version you choose goes in with “Use in frame”.
Credits
Previews and final versions cost credits. You see the cost of each action before you run it. You buy credits in Credit packs. Secure payment by Stripe. If generation fails, takes too long, or the instruction is blocked by content moderation, your credits come back: “Your credits were returned.”
When AI is not enough
The editor improves a photo, but it does not replace a good file. A low-resolution photo can still be too small for a large format, so before you choose a large frame check how much DPI you need. For portraits and family photos, always compare the final version with the original before you use it in the frame. The face of someone close to you should stay their face.
ai photo editorfix photos with ai onlineedit a photo with an instructionremove people from a photo backgroundopen eyes in a photosmooth wrinkles in a photoblur a photo backgroundphoto for printing in a framephoto gallery wall
Framky Club
Claim a special discount on your first order
Sign up and we'll send you a code with a bigger discount than the shop offers — plus occasional inspiration for your photo gallery wall.
Framky Artists is a catalogue of photographs by independent photographers. Filter by category, colour or place, mix them with your own and order a gallery in frames without glass.
A scatter gallery wall is a salon-style arrangement of scattered photo frames. See how it differs from a grid, how many frames to use, and which Framky kits to pick.